‏إظهار الرسائل ذات التسميات tips and trick. إظهار كافة الرسائل

الأحد، 24 ديسمبر 2017

How to Access Files And Folders on Windows Computer Network.

How to Access Files And Folders on Windows Computer Network.

Access Files And Folders on Network. This guide will show you how to access all files and folders on the computers network. And this guide work for all most windows operating system (Windows XP, Windows Seven, Windows 8, 8.1, Windows 10). If you have successfully set a computer network, and the files and folders already shared, now you will able to access the file. Now, follow the instruction guide below.

Access Files And Folders on Windows Computer Network.

  1. All you need is open windows explorer now.
  2. Your computer has the Logon Password. If you have not set your Logon password see the instruction below.
  3. All the computer must be on the same network type.
  4. Now, You can do one of the following guide to open Windows Explorer.
    • Right click start - then click file explorer (for windows 8.1)
    • Right click start - then click Open Windows Explorer (for windows Seven)
    • Press Start Button (on keyboard) + E
  5. Make sure you have noted IP Address for all connected computer on the network.
  6. For example :
    • Computer A has IP Address : 192.168.1.65
      IP Address computer A
      IP Address computer A
    • Computer B has IP Address : 192.168.1.4
      IP Address computer B
      IP Address computer B
  7. Now go to the windows explorer window. 
  8. If you want to access a files or folders on computer A, you must type the IP Address on computer A with double backslash before it. 
  9. If you want to access a files or folders on computer B, you must type the IP Address on computer B with double backslash before it. 
  10. type it at the windows explorer address bar then press enter.
    • For example : \\192.168.1.65
    • Address Bar windows explorer
      Address Bar windows explorer
  11. If everything is correct, after you press enter you should see a windows security window.
    windows security window
    windows security window
  12. Now enter the user name and password at available fields.
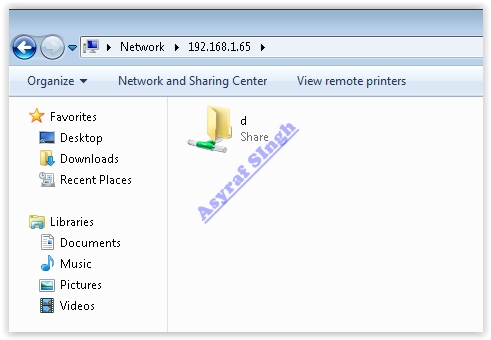
  13. If you have successfully enter the user name and password you will see a shared folder from the other computer.
    shared folder - windows network
    shared folder - windows network
  14. Now you can access the folders and files on the windows computer network.
  15. Finish.

How to Share Files and Folders In a Computer Running Windows Seven & Windows 8.1

How to Share Files and Folders In a Computer Running Windows Seven & Windows 8.1.

Share Files and Folders. This is very simple and easy guide how to Share Files and Folders In a Computer Running Windows Seven & Windows 8.1. After you create a network between two or more Windows computer, now you can communicate between them. For example we would to share a files and folders on the network. So, every computer that connected on the same network will access the files and folders. Now follow the easy guide below.

Share Files and Folders In a Computer Running Windows.

  1. This guide work both of Windows Seven or Windows 8.1
  2. Now, open windows explorer. You can do one of the following guide. 
    • Right click start - then click file explorer (for windows 8.1)
    • Right click start - then click Open Windows Explorer (for windows Seven)
    • Press Start Button (on keyboard) + E
  3. Once the Windows Explorer open, now go to the files or folder you want to share.
  4. For example we want to share the Asyraf Singh folder
  5. Now, right click at the Asyraf Singh folder, then click Properties.
  6. This will open the Asyraf Singh properties window.
  7. Then click at the Sharing tab.
    folder properties window
    folder properties window
  8. Now, click Advanced Sharing. and you will open the advanced sharing properties.
  9. Then give tick on Share this folder.
    advanced sharing window
    advanced sharing window
  10. If you want to set the folder permission, you can click Permissions button. here you can change what the permission type of this folder. There are three options and you can select all.
    • Full Control
    • Change
    • Read.
      folder permissions window
      folder permissions window
  11. Now click Apply then OK. it will close permissions window.
  12. Now click OK to close Advanced Sharing window.
  13. Then click Close to close folder properties.
  14. Finish, Now you have successfully Share Files and Folders In a Computer Running Windows Seven & Windows 8.1

[Guide] Step by Step How to Create Windows Seven | 7 Logon Password.

[Guide] Step by Step How to Create Windows Seven | 7 Logon Password.

Create Windows Seven Log in Password. For a security reason you must set your windows seven log on password, when you set it the user will be asked to enter their password every time they log in. If you're not set the password for your windows seven computer, it's mean that everyone in your home or office has full and unrestricted access to everything on your windows seven computer. Now follow an easy guide below how to Create Windows Seven | 7 Logon Password.

Step by Step Create Windows Password.

#1. First Method.

  1. Click Start
  2. Then click Control Panel.
    windows seven - control panel
    windows seven - control panel
  3. This action will open Windows Seven control panel. Now, Under the User Accounts and Family Safety category, you can click on Add or remove user accounts.
    Add or remove user accounts
    Add or remove user accounts
  4. Now, Choose the account that you would like to create a password for, just clicking on the user account name.
    user account name
    user account name
  5. Then you will open Change an Account window, at this window you can click create a password.
    create a password windows seven
    create a password windows seven
  6. Now, Type the password you want to set for this user account at the new password field,
  7. Then confirm your password, by typing at the confirm new password field.
  8. If you want type a password hint, you can type it on type a password hint field.
    create a password windows seven
    create a password windows seven
  9. Once you finished type a password, now click create password button.
  10. Finish, Now every time you Logon to your windows computer, you will be asked to input correct password.

#2. Second Method.

  1. Click start.
  2. Then right click on My Computer and select Manage.
    windows seven - my computer - manage
    windows seven - my computer - manage
  3. Now you will open the Computer Management window.
  4. Then, expand Local Users and Groups at the left side pane, and then click on the Users
    Computer Management console.
    Computer Management console.
    .
  5. Now focus at the middle pane, there you will see all windows user account name. Now, right click on the user account name that you want to create a password for, and then click on Set Password.
    set password - windows seven
    set password - windows seven
  6. Now, you will see a pop up windows appear on screen, you can read all text on this windows before click proceed.
    proceed create windows seven password
    proceed create windows seven password
  7. Now, Type the password you want to create and then confirm it by typing it again on the next field, then click OK.
    confirm password windows seven
    confirm password windows seven
  8. Now, Your Password will be changed. then click on OK
    click OK - create password windows password
    click OK - create password windows password
  9. Then close Computer Management console window.
  10. Finish. Now every time you want to logon to computer, you will be asked to input your password.

السبت، 23 ديسمبر 2017

How to Transfer File Between Computer to Computer Using Android Tethering.

How to Transfer File Between Computer to Computer Using Android Tethering.

Transfer File Between PC to PC. If you have any problem how to transfer file between computer to computer, or laptop to laptop you can follow this guide below, this is very simple and easy guide. So if you are a beginner you will never find any problem to follow this guide. To connect between computers we need a WiFi or Hotspot connection. But we can create own Hotspot using our Android smartphone device. So your all your device (two PC and one Android Smartphone) connected at the same network. If so, you will be able to transfer from one computer to the other computer via WiFi network. Ok, let we start our guide below.

Set Up Computers Network.

  1. Enable your WiFi | Hotspot on your Android device.
  2. On this case we use two computer with different Operating System, but at the same platform. 
    • Computer A running Windows 8.1
    • Computer B running Windows 7 Starter Edition.
  3. Now. Go to the computer A.
    • Go to the System Tray Icon (this icon located at the right bottom of screen)
      windows 8.1 try icon
      windows 8.1 try icon
    • Click on the network icon, it will show pop up window. If there is available WiFi network it will shown on list. for example AndroidAP is SSID name of WiFi Hotspot.
      hotspot SSID name
      hotspot SSID name
    • If your computer is successfully connected to the Hotspot or WiFi network, you should see your network icon change like picture shown below.
      network connected
      network connected
  4. Now. Go to the computer B.
    • Computer B running Microsoft Windows 7 Starter Edition, And there are no difference to connect a computer to the Hotspot for most of windows operating system. You can see step 3 above.

Find IP Address For All Computer.

This is very important step to continue this guide. Now you must check and find IP Address for All computer or laptop.
  1. How to Find IP Address computer A ? click here
    • for example IP Address computer A is 192.168.43.3.  (write down this number)
  2. How to Find IP Address computer B ? click here
    • for example IP Address computer A is 192.168.133.21.  (write down this number).

Set login password.

  1. Set Login password computer A (running Windows 8.1) ---> see this guide
  2. Set Login password computer A (running Windows Seven) ---> see this link

Share a Folder or Drive.

  1. You must set a sharing files, folders, or drive. 
  2. See this guide how to share files, folders, and drive on windows computer. 

Access The Files And Folders on computer Network.

Now, it's time to transfer by copy and paste all file on the network. see this guide to do this task.

الجمعة، 22 ديسمبر 2017

Guide How to Find My Computer IP Address Running Microsoft Windows.

Guide How to Find My Computer IP Address Running Microsoft Windows.

Find My Computer IP Address. If you are now using computer that running Microsoft Windows, and you want to check your IP Address, you can follow this guide below. When your computer or laptop connected to the network it's automatically assign with IP Address to communicate with the others computer. You can set your computer IP Address manually or automatically, for automatically IP Address setting it's called with DHCP (Dynamic Host Configuration Protocol). On the computer network are not allowed to have the same IP Address, or your computer network will got warning if there are IP Conflict.

Check Computer IP Address.

  1. Go to start and click run. or you can press windows button + R on keyboard.  
    launch run - windows + R
    launch run - windows + R
  2. Then type cmd, and click OK or press Enter.
    run cmd - windows command
    run cmd - windows command
  3. Then you will open command prompt window on your windows screen.
    command prompt
    command prompt
  4. Now, type ipconfig then enter.
  5. If your network setting is correct, then you will see your IP Address appear on command prompt windows.
  6. At the picture above we know that my IP Address is ; 192.168.43.3
  7. Finish.

الأربعاء، 20 ديسمبر 2017

How to Remove Forgotten Windows Password Using Command Prompt [Guide]

How to Remove Forgotten Windows Password Using Command Prompt [Guide].

Remove Forgotten Windows Password. Did you forgot your windows password, and you want to log in to your computer ? I think you will be rejected by your computer, because you are considered as an unauthorized user. certainly it is very annoying. But don't worry on this guide we will show you How to Remove Forgotten Windows Password Using Command Prompt. You just need a original copy of installation windows CD/DVD and using a simple command on windows command prompt. This guide can apply on windows 7 Seven.

Remove Forgotten Windows Password.

This is a complete instructions guide to Remove Forgotten Windows Password Using Command Prompt.
  1. You must have a copy of the Windows installation disk.
  2. Then, boot your computer using Windows CD.
  3. On the next screen, click Repair your computer.
    remove forgotten windows 7 password
    remove forgotten windows 7 password 
  4. Then you will see System Recovery Options on your screen. This will searching for windows installations.
  5. Once searching finished, now you can see that your operating system (windows 7) listed on the window. Then click Next.
    remove forgotten windows 7 password
    remove forgotten windows 7 password 
  6. Then click Command Prompt, 
    remove forgotten windows 7 password
    remove forgotten windows 7 password 
  7. On the prompt, input this command below, to backup the original sticky keys file then press enter.
    • copy c:\windows\system32\sethc.exe c:\
  8. Then type the following command below ;
    • copy c:\windows\system32\cmd.exe c:\windows\system32\sethc.exe
  9. And this is the command prompt image.
    remove forgotten password using command prompt
    remove forgotten password using command prompt
  10. Now type exit, and reboot your computer.

How To Resetting Your Password.

  1. Start your computer, 
  2. Once you get to the login screen, press the shift button on keyboard 5 times.
  3. This command will launch an administrator mode command prompt.
  4. Now to reset the password you can type the following command, replacing the username and password with the combination you want:
    • net user asyraf MyNewPassword
  5. Replace asyraf with your user name, and replace MyNewPassword with your password.
  6. Finish.
note : If you want to put the original sethc.exe file back, you can reboot your computer using windows installation CD/DVD again, then opening the command prompt, and copying the c:\sethc.exe file back to  ;
c:\windows\system32\sethc.exe.

[Guide] How to Remove Forgotten Windows Password Using Parted Magic in UBCD

[Guide] How to Remove Forgotten Windows Password Using Parted Magic in UBCD.

Remove Forgotten Windows Password. This guide show you How to Remove Forgotten Windows Password Using Parted Magic in UBCD. UBCD is called Ultimate Boot CD. It's very terrible when we want to access our computer, while we have forgotten our password. On this case, I think you would guess any password, but it still failed to log in. But now we could Log in to our windows desktop by removing forgotten password using Parted Magic UBCD.

When you try to Log in to your computer, then you forgot the password, you will get a warning that the user name and password is incorrect.

Remove Windows Password Using UBCD.

To be able to use this guide, you'll need to download Ultimate Boot CD (UBCD) first. And below is the complete guide.
  1. Download UBCD Here
  2. Once download complete, now you must make the UBCD bootable, so you can load UBCD at the first time you start the computer.
  3. This is the UBCD menu.
    Ultimate Boot CD menu
    Ultimate Boot CD menu
  4. .On this menu, please select Parted Magic then press enter.
  5. Then on the Parted Magic window, you can select Alternate Graphical Server.
    UBCD - Alternate Graphical Server.
    UBCD - Alternate Graphical Server.
  6. Wait a minute, it will loading all necessary files.
  7. Once everything is done, you will see parted magic software interface.
    parted magic software interface.
    parted magic software interface.
  8. On this screen, you can click start (it's located at the left bottom of the screen), then click System Tools, then click  PCLoginNow.
    Remove Forgotten Windows Password
    Remove Forgotten Windows Password
  9. Then you will see PC Login Now welcome screen. to continue please click Next.
    PC Login Now welcome screen
    PC Login Now welcome screen
  10. Now, select the system, on this screen you will see a system name (for example : Windows 7 Home Premium) just select/click it and then click Next.
    Ultimate Boot CD - select system
    Ultimate Boot CD - select system
  11. On the next screen, you will see all windows user name show on list, you must select your user name, for example : test.
    Ultimate Boot CD - select user name
    Ultimate Boot CD - select user name
  12. Then make sure to give check on  Password is empty. then click Next.
    UBCD- password is empty
    UBCD- password is empty
  13. The UBCD will applying operations, please wait. If the operations is successfully you will get a pop up windows that say Reset successfully ! do you want to reset the other user ? is you click NO, you will be ask to reboot the computer.
  14. Now, reboot your UBCD.
    UBCD - reboot the computer
    UBCD - reboot the computer
  15. Finish.

Guide | How to Fix Boot Error 0xC000000F on Windows 7 Seven.

Guide | How to Fix Boot Error 0xC000000F on Windows 7 Seven.

Fix Boot Error 0xC000000F. Now we will show you how to Fix Boot Error 0xC000000F on Windows 7 Seven, on this boot error the windows will failed to start. and you will get an error info that this error caused while attempting to read the boot configuration data. Now follow this guide below to fix Boot Error 0xC000000F on Windows 7 Seven.
Fix Boot Error 0xC000000F

How to Fix Boot Error 0xC000000F.

  1. You must boot your computer using windows 7 CD/DVD. If you do not have a windows 7 CD/DVD you can download via available link below.
  2. Now, boot your computer via CD/DVD drive. to do this you must access your computer BIOS to set first boot on your computer. Each computer has a different way to access computer bios, depending on the brand. generally using the F2, Enter, or Delete button.
  3. Once you have successfully set the computer to boot from CD/DVD. Now reboot your computer again, then press any key when prompt at the first boot.
  4. Now, windows is start to loading files.
    Fix Boot Error 0xC000000F
    Fix Boot Error 0xC000000F
  5. Wait a minute until you see windows 7 installation option screen appear. and then click Next.
    Fix Boot Error 0xC000000F
    Fix Boot Error 0xC000000F
  6. On the next screen, click Repair your computer.
    Fix Boot Error 0xC000000F
    Fix Boot Error 0xC000000F
  7. Then you will see System Recovery Options on your screen. This will searching for windows installations.
    Fix Boot Error 0xC000000F
    Fix Boot Error 0xC000000F
  8. Once searching finished, now you can see that your operating system (windows 7) listed on the window. Then click Next.
    Fix Boot Error 0xC000000F
    Fix Boot Error 0xC000000F
  9. Then click Startup Repair, 
    Fix Boot Error 0xC000000F
    Fix Boot Error 0xC000000F
  10. And now setup will searching for problems.
    Fix Boot Error 0xC000000F
    Fix Boot Error 0xC000000F
  11. Wait until finish, then click finish button, and setup will return to the System Recovery Options.
  12. Now, click restart.
  13. Finish.

Guide How to Disable and Enable Pop Up Help Tips in Windows 10

Guide How to Disable and Enable Pop Up Help Tips in Windows 10.

Disable and Enable Pop Up Help Tips. This guide will show you how to Disable and Enable Pop Up Help Tips in Windows 10. Now follow this guide below how to do this. and make sure your computer is running on windows 10 operating system.

Disable Pop Up Help Tips.

  1. Turn on your Windows 10 computer, until desktop ready to use.
  2. Now, click start button at the left bottom of your screen.
    Disable and Enable Pop Up Help Tips in Windows 10
    Disable and Enable Pop Up Help Tips in Windows 10
  3. Then click Settings that appear at above start button.
  4. On the new window, now you can click System.
    Disable and Enable Pop Up Help Tips in Windows 10
    Disable and Enable Pop Up Help Tips in Windows 10
  5. Then, on the next screen you can click Notifications & actions.
    Disable and Enable Pop Up Help Tips in Windows 10
    Disable and Enable Pop Up Help Tips in Windows 10
  6. Then, on the Notifications window under show me tips about windows you can turn it Off.
    Disable and Enable Pop Up Help Tips in Windows 10
    Disable and Enable Pop Up Help Tips in Windows 10
  7. Finish, now you have successfully disable Pop Up Help Tips in Windows 10.